
How to Make a Weighted Blanket: Every Little Thing You Need to Know
For transparency, I wanted to let you know that this page contains affiliate links. What is an affiliate link? In a nutshell, as an Amazon and Shareasale affiliate if you make a purchase after clicking a link on this site, I may receive a small commission, at absolutely no extra cost to you! Why do I have affiliate links on my site? Running a site like this and producing quality free content can be surprisingly time and resource intensive. Earning some affiliate income allows me to offset and justify the time and cost involved in producing content, paying for hosting, maintaining the site etc.
If you are considering a weighted product for yourself, a friend, family member or child: Please make sure you are well educated on the right weight to use, and whether use of a weighted product would be safe in your specific situation. If you are at all uncertain, please consult a qualified medical practitioner. Material provided on this site is for general informational purposes only and should not be considered a substitute for qualified medical advice (more info about that here).
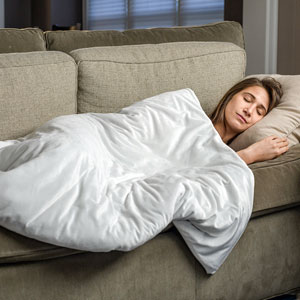
If you’re anything like me, you love curling up in your warm toasty bed, with a nice heavy blanket to lull you into a deep peaceful sleep.
But did you know that the benefits of a weighted blanket go far beyond mere comfort?
These heavy blankets have numerous benefits, and are actually used as a form of weight therapy.
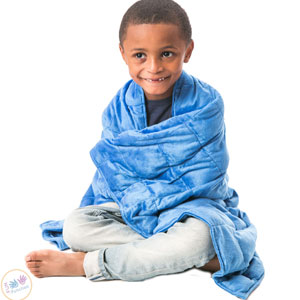
A weighted blanket not only provides a sense of security for children and adults, but occupational therapists have been using them in the treatment of autism, anxiety, sensory processing disorders, sleep disorders, multiple sclerosis and even ADHD.
The need for this type of blanket has grown in popularity of late, and therefore can be quite pricey. The fabulous thing is, however, that you can make your own comfy heavy blanket too.
You can make your own as a solid piece, or as a removable inner between two layers, making it easier to keep clean.
Let’s look at how you can make your own heavy blanket and save a few dollars.
Weighted Blanket DIY
Materials You’ll Need to Make Your Own Heavy Blanket
Making a weighted blanket is no simple task. It requires a lot of energy and determination, not to mention a whole bunch of tools.
There are a few instruments you’ll need to complete this project.
Your basic DIY kit and requirements will consist of:
- A Large workspace, table and or floor space
- Sewing machine with durable needle and matching thread
- Your preferred fabric (Equal amounts of material to create your top and bottom blanket, depending on the size you want to make)
- Filler (1 pound for every 10 pounds of body weight plus 1 extra pound)
- Pins with big colorful plastic tops
- Material scissors, blade or sharp box cutters
- Measuring tape and ruler
- Marking pen or chalk
- Kitchen scale or measuring jug
- Funnel
- Poring cylinder (plastic tubing or wrapping paper tube can also be used)
Picking Your Blanket’s Fabric
You can really use any fabric you like. However, when choosing it, ask yourself these questions:
- Is it high quality? If you’re looking at long-term use of your weighted blanket, you’ll want to invest in a fabric you’ll be comfortable with and love laying under. Choosing the cheapest option may not give you the satisfaction or therapeutic benefits you desire.
- Is it durable? Is it strong enough to last for a long period of time and not tear by the second use? Check that it’s a material that does not fray easily.
- Is it workable? Will it slip and slide out of your hand and off the sewing machine? Or will it grip and sew well?
- Is it breathable? Can air flow through the material comfortably to regulate your body temperature? There is nothing worse than sweating underneath your blanket all night long. Though this will also depend on the climate in your location.
- Does it stain easily? Make sure your fabric is easy to clean and doesn’t hold onto fluff and dirt.
- Do you have any sensitivities? Do you have skin allergies or irritation towards certain materials? Do you have a heat or sensory sensitivity? If so, an organic bamboo or pure high-quality cotton may be the best options for you.
Once you’ve considered these factors you can look at fabric options such as Fleece, Minky, Bamboo, Cotton and much more depending on your preference.
Choose any Weighted Blanket Filler
There numerous options here too, but for the purpose of this article we will use plastic poly pellets as an example, they are machine washable and tumble dryable. And one of the preferred fillers because of their availability and cheap price.
If you want to read more about the fillers, go to another of our articles here.
How Do You Procede Now?
You’ll need a significant amount of space, so make sure you have a large table and extension table available on your sewing machine to work with.
If you don’t you may need to move your machine to the floor and work there if you’re able to (just watch out for your back).
Before you begin you’ll also need to separate and calculate weighted batches of pellets to add systematically to your blanket as it progresses.
To do this simply calculate the weight of your blanket (sewn together) in ounces / the number of squares on the blanket = the number of ounces of pellets per square.
If you’re unsure about the weight of your whole blanket, simply bundle up the pellets (make sure they’re inside their own bag) with your blanket and place it into a plastic bag. Then weigh it on your bathroom scale. Remember that you’ve already calculated your total pellet weight from the equation I mentioned before.
Then you should place your divided and weighted batches of pellets into little bowls or plastic bags to prevent them from spilling during your project and adding them easily as you work.
The design and size of your blanket are also totally up to you. Choose shapes, patterns and colors that you, or whomever you are making it for, will love. This will provide greater satisfaction when using it.
About the size, some people like to cover their whole body, if you are making a blanket for a folk with some big bones, get ready for some heavy duty sewing. If sewing for weeks is not for you, then going with a 70% of the height, and about 20 cm more than the needed width to cover person might be enough to accomplish its purpose.
A good idea is to make your weighted comforter out of plain material that you can place inside a duvet cover of your choice. This way you can change the look of your blanket often without losing the great benefits or having to make multiple blankets.
If you decide to do it this way, make sure you stick to the basic factory measurements, so your blanket can easily fit inside a store-bought single, queen or king size duvet cover.
Sewing Your Weighted Blanket
Keep in mind that as your blanket progresses it’ll become heavier and more difficult to work with. You’ll want to be prepared for that.
- Now, once you have determined the size of your blanket, cut your material to fit. Equal measurements for top and bottom layers are required with space for a 2-inch seem and 4-inch edge or bigger if you prefer.
- Place the material right sides or patterned sides together. (Your blanket will now be inside out).
- Measure a 2-inch seam or hemline on 3 sides of your blanket. Keep one side open to pour-in the filler. Sew the seams shut and turn the blanket outside-in so your pattern is now on the outside.
- Measure a 4-inch edge along all 4 borders of your blanket for effect.
- Now measure small, even squares (or triangles if you want to get creative), throughout your blanket.
- Sew along the vertical lines you drew to create equal-sized funnels to add the pellets.
- Divide your pellets evenly according to the number of squares you have, considering the weight allocation. (Pellets must be distributed equally to avoid tearing and uneven weight, which can be very uncomfortable).
- Funnel the allocated pellets down each tube in the blanket all the way to the bottom and sew the horizontal lines shut, ensuring no pellets have moved into the open area. Also, avoid having pellets on the seam line as hitting one can damage your sewing needle).
- Continue adding pellets steadily and sewing horizontal lines shut until you’ve filled all your square pockets up to the 4-inch edge at the top of your blanket.
- Fold the 2-inch top seam inward and sew it shut.
And hey presto, you have your very own homemade heavy blanket!
I do suggest that (If feeling brave and confident) you give your new blanket a quick wash and tumble dry on a very low temperature to remove any dirt it may have picked up during the making process and of course the lines you drew.
Should You Make Your Own Weighted Blanket?
Doing a bit of DIY is never a bad thing, however, in the case of a heavy blanket it, might be a different story.
Considering the time and effort it takes to make such a blanket, it may not always be worth the money you save.
Apart from the tools, you need to consider whether you possess the skills it requires to make such an item.
Also, remember that fabric and filler won’t be your only expenses. If you don’t already have all the items I mentioned in the kit, you’ll have to fork out some cash for those too, and that may prove to be more expensive than just simply buying the blanket to begin with.
Now having said that, if you do have to purchase these initial items, the bright side is that you’ll have them to use on another DIY project should the need arise. They aren’t merely for single use.
But, if like me, you are not a sewing expert and don’t have a proper sewing machine and large enough workspace, it may be best to spare yourself some frustration and just buy one.
At the end of the day, it really depends on your personal preference.
How Much Money Can You Save?
At the end of the day, it really comes down to your value compass. Do you value your time more than you do money, or do you value money spent more than time? It’s all relevant.
If money is your main concern, let’s look at what this DIY project could potentially save you.
Now, remember that these blankets come in various sizes and can be made with different materials.
All of this will influence the price point.
Based on my research the cheapest ok-quality-weighted blanket currently on the market runs for around $70 for a really small size and around $200 for an extra-large size.
Material costs for making it yourself will run anything from $5 per pound for pellets, and a basic fleece material costs $6.97 per yard depending on where you shop.
Apart from the time you spend, the monetary amount you’ll probably save will be around $40 to $70, again depending on the size of the blanket and the materials you use.
If, once you’ve considered all the costs (both time and materials) involved in making your own weighted blanket, you think buying a weighted blanket is a better choice, here are some popular options you might like to consider:
Image | Name | Fabric | Filler | Decorations | Prices & Details |
|---|---|---|---|---|---|
 | Moonbow | Bamboo and polyester | Micro Glass beads | 2 colors | |
 | Fun and Function | Soft Plush cotton / polyester | Polypropylene pellets | 1 color | |
 | Luxome | Ultra plush minky or luxury bamboo | Glass beads (certified lead free) | Many colours available | |
 | Mosaic Weighted Blankets | Cotton, minky and textured fabric choices | FDA compliant plastic pellets | Widest range of colors and patterns |
What if I Want to Make a Weighted Comforter for Autism or Another Health Condition?
The use of weighted blankets for autism, is fantastic as it helps your body to naturally produce serotonin this helps fight the symptoms that non-neurotypical individuals struggle with every day.
The key for relying on these kinds of products, would be their portability.
People, and especially children who suffer from conditions such as autism can have trouble concentrating in school among other things, and there for being able to take your blanket anywhere, will certainly be of great benefit.
I know you’re thinking that this may prove difficult, as these things are heavy and bulky for a child and even an adult to cart around all day.
So, consider the use of a weighted lap pad instead.
It’s smaller and more lightweight than a blanket, and will be much easier and more convenient to carry around and use as needed.
The weighted lap pad is placed on the lap for comfort and security aiding in you or your child’s ability to concentrate and learn.
Now, there is no real difference in the procedure for making a heavy blanket for autism.
You might just want to be a bit more selective about the materials you choose to use if your catering for certain health conditions.
Naturally, if you consider making a lap pad for your child or yourself, you will measure the circumference of you or your child’s thighs in a seated position, so the pad fits comfortable over the edges of your thighs and knees.
Just always make sure the pellets and materials used are non-toxic.
How Does the Inner Weighted Part of the Blanket Stay Attached to the Outer Cover?
In most cases the heavy inner is detachable from the outer cover, making it easier to wash, and last much longer.
You already know that the pellets are secured between two layers of your choice of fabric and sewn into clusters keeping them from moving around or dislodging as you’ve seen during our DIY procedure.
The pelleted inner part is usually placed inside an outer casing, similar to a duvet inner placed inside its colorful cover, and is secured into position with a zip, series of push buttons or regular buttons that can be fastened through sewn openings in the opposite piece of material.
This prevents the heavy inner from dislodging or moving around inside its cover.
It really is as simple as that.
